Sunday, January 3, 2016

Mouse Paint with Kindergarten


It's time to start color mixing with the Kinders!  Painting with Kindergarten is scary, but with teaching responsible behaviors, it can be one the the best classes ever.  Kindergarten students always ask in the beginning, "When are we gonna paint?????"  After careful planning and explanation of care, it's finally time!

I like to introduce the project and activity by reading the book "Mouse Paint" by Ellen Stoll Walsh.  In the book 3 white mice find the primary colors in paint jars and dance around, discovering different colors mixed on their feet.

After reading the book, I go over how yellow, red, and blue can make the secondary colors.  Before I get ahead of myself, here's the list to set up:

Materials
-Mouse Paint by Ellen Stoll Walsh
-This amazing activity sheet that I found within Pinterest, and a huge thanks to whoever designed it!


-Yellow, Red and Blue Tempura Paint
-Styrofoam plates
-Black marker
-Pencils
-Medium brushes
-Water containers and water
-Pre-cut paper towels
-Tablecloths

-white paper
-pink paper
-scissors
-glue

Here's how I set up the plates in advance.  I do not have much room to store in advance, so I started setting this up in the previous class.  I also drew circles and added the first letter of the color word on the plates to help the Kinders with their color identification.


Objectives
Students will not only learn how to be responsible with painting materials, but also explore how to mix colors to create other colors.

Directions
This project took approximately 2 40-minute class periods to complete.

Day 1: Start off by reading Mouse Paint to the students.  Once finished, go over the colors that were mixed by the mice in the story.  Show the students the activity sheet to help in mixing colors.  Demonstrate how to properly take a small amount of paint to mix the secondary colors between the primaries (if you don't, students will mix the entire plate).  Have students complete the activity sheet.  Once activity sheet is complete, collect sheet and place a white paper in front of the students.  Inform students to create their own painting with the colors they mixed.

Day 2:  Since the paintings are now dry, today they'll start making their mice!  I created a template of 3 ovals (ran through the copy machine for the amount of students) and had students cut out the ovals.  Using pink construction paper scraps, students drew and cut out the ears, and cut a thin strip for the tails.  Using a black marker, they drew in the eyes.  As easy as this step seemed, you will having students finishing in 10 minutes and others finishing last minute.  Have students glue their mice wherever they want on their painting, as if the mice are making the painting!

The one step I would still like to add on is a paintbrush.  Since this was my first time with the lesson, I wanted to see the length of time it took to create the mice alone.  If I were to add on paintbrushes for each mouse, I plan on having the brown strips pre-cut to save on time with construction.


 Here's some finished example by the Kindergarten students!  


(This is one of my special needs students.  He doesn't normally like cutting, drawing, or gluing, but he LOVED painting!!)

(This student remembered that at the end of the book, the mice left a spot white because of the cat!)


Friday, January 1, 2016

Art History Strategies: January's Stepping Stones


To view the full article from Arts & Activities magazinepluck click here.
As art educators, we do our best to squeeze in as much as we can within our curriculum in the time we have in the classroom. From process to product, elements of art, principles of design, culture, integration and history, we ultimately bridge the gaps between all the subjects, no matter what grade level. One of the most integrated subjects we teach relates to social studies and how the arts played an important part in documenting and preserving our human history.
There are many ways to incorporate art history into our lessons for all grade levels. Projects can be an imitation of an artistic style or a practice of a specific method used in creating. Here are only a few of many ways you can incorporate art history into your curriculum.

Ancient Civilizations 
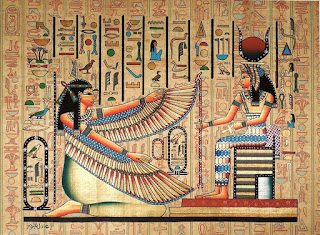
In ancient history, we’ve discovered how pictures came to be after finding art on cave walls and ceilings (Prehistoric). We’ve learned that art remained unchanged for thousands of years in certain civilizations because of an obsession with order and precision (Egyptian). We’ve also learned that art had been a way to document past events throughout history.
In my district, our sixth-grade students learn about ancient civilizations in their social studies curriculum. Within the school year, they study the Prehistoric time period through the Renaissance, and there’s a huge portion of how art helped to create and document our history in that time frame.
In planning my lessons, I decided to combine my projects with the ancient civilization curriculum. My Prehistoric art include symbols and story, and I enjoy using pastels to create the images. I’ve seen students create “cave” paintings/drawings on paper under desks or tables, or they can crunch paper to create the “stone” effect while drawing their images.
Egyptian art includes learning about hieroglyphs, the style of profile drawings, and the decorative motifs on their sarcophagi. You can create jewelry, embossed scarab beetle drawings on copper or aluminum, or even scratch-art portraits on gold scratchboard.
In Greek history, I share the creation of theater and students make clay faces depicting characters. I’ve also seen various grade level lessons on clay vessels and column designs created by other art teachers. With medieval art, we create stained-glass window designs, but I’ve seen castle constructions, shield emblems, and tapestry-inspired lessons. In the Renaissance, we visit the creation of the printing press (printmaking) and finish the school year with a Mona Lisa parody drawing. There are so many projects you can create inspired by the Renaissance that incorporate process and artistic understanding.


World Cultures 
In studying world cultures, you are also looking into how art documents the history and traditions of each culture in different countries. I like to visit cultures throughout the school year, especially the cultures of many students in my district. We have a high population of Polish, Arabic and Hispanic students, and they love it when they create an artwork inspired by their own culture.
You can tackle world cultures in many ways. One way would be to create your entire curriculum inspired by different cultures. Each grade level can “visit” a country in each project throughout the year. You can also dedicate one entire month solely on cultural projects and host a “multicultural faire” with all the finished projects. If you feel you do not have the time to tackle that amount of work, try to fit one cultural project in each grade level at least once throughout the year. Over time, you may develop a variety of lessons inspired by different cultures.

Art Time Periods 
When moving through art history, we start to break down into different art “eras” that influenced the times they existed. From Baroque to Rococo, Art Deco to Constructivism, Surrealism to Dada, there’s a wide list of styles of art through time you can incorporate into your lessons.
In my Primary grades, I like to work with artist examples from different art styles. I stay within the range of Modern to Contemporary art because students find more of the colors and styles exciting and love to try out the artistic styles themselves. Many art-supply companies offer art history “timeline” posters that can be hung around the room. In the past, I’ve attached artwork examples next to the art styles for students to see what time period they’ve learned about while creating their projects.
A great way to display your art history-inspired examples is with displays. Have fun with creating your own timeline on the school walls and having students fill in the art eras with their own project examples. You can also have students reflect on their work in their artist statements attached to their projects. Your school walls can turn into your own art museum, with you as the curator!