Friday, December 21, 2012

Snowflakes for Sandy Elementary


By now many of you have seen this message spread around Facebook, or even in your own schools:


Something we can do for the Students of Sandy Hook Elementary School. Welcome Students to a Winter Wonderland

When school resumes for Sandy Hook, it will be in a new building. Parent-volunteers are working to ensure that the students are welcomed back by a winter wonderland with the entire school decorated with as many unique snowflakes as possible. We encourage senders to be as creative as possible, remembering that no two snowflakes are alike. Please make and send snowflakes by January 12, 2013 to the Connecticut PTA address: 

Connecticut PTA
60 Connolly Parkway
Building 12, Suite 103
Hamden, CT 06514


Our local IFT even shared the message, and my colleagues jumped on helping any way they could.  Since today was a shortened day (being the last day before break), I asked my morning classes if they would like to help create snowflakes for Sandy Elementary.

Prior to making the snowflakes, our students had conversations with parents and teachers.  Students had questions earlier in the week, and we addressed them with care and consideration for everyone involved.  When I introduced the idea to my students, I explained that we were doing our part to show that we cared about Sandy Elementary students and wanted to brighten their day.  Even my adorable class clowns were focused with the project.

On a side note, I hate glitter.  As much as I hate glitter, I still pulled it out to make the projects more colorful and bright for the students.  The kids had loads of fun drawing designs with glue on their snowflakes.

By the time we were done, I had quite a few tables covered with glittered snowflakes, and our Jr. High even brought their donations in to join with the elementary's to be shipped off.

I do have to give credit to my co-workers for sending out the school email asking who wanted to get involved.  When our teachers were notified by the union about the project, I was unfortunately out sick, but when I checked my emails and found out the project was going to happen, I was happy to help out any way I could when I came back to work (on another side note, I hate being sick too).  Thank you to my co-workers for starting it and giving me an opportunity to help!

My snowflakes were made with 8.5 x 8.5 inch white paper.  I asked the students to fold three times, then cut out any shapes they wished.  I was thinking of a way for the parents volunteers at Sandy to hang the snowflakes easier, so I had my students glue their snowflakes to colored paper.  The students then trimmed the colors paper any way they wished, by cutting a circle, square, or trimming around the snowflake shape.

Before the students were ready for glue, I gave them a chance to write a positive message to the students on the back of their snowflakes.  Some did, and their words were beautiful.  Made me want to cry.

Last, the students traced designed on their snowflakes with glue.  I controlled the glitter and did the pouring, and no matter how old the students were, they were amazed with how the glitter covered the glue.

Simple snowflake, simple project, wonderful gifts for those who need some happiness.


If you have a chance during this season, please consider doing your part.  The parents are asking for snowflake donations to be shipped by January 12th.  There are plenty of snowflake designs floating around on Pinterest that you can use.

Here are a few ideas I have found to help you out!

Positive/Negative Space Snowflakes

Snowflake Banners

Crayon Resist Snowflakes

Paper Snowflake How-To's

Lacy Snowflake Tutorial


Saturday, December 8, 2012

Choosing a Cart and Finding Some Space: December's Article


This month for Arts & Activities Magazine, my article is titled "Choosing a Cart and Finding Some Space."  The article focuses on what works for you in your traveling situation.

When I began pushing a cart from room to room, I quickly discovered which carts worked and which I wanted to push out of the school.  I hated how heavy carts didn't want to work with me as I tried turning corners or squeezing carts into classrooms.

I also wanted to focus on how to find space to store materials.  In most traveling situations, there is no space to store anything.  The key is to communicate your needs to everyone involved without appearing that you're complaining.  Express the need to share the student's creations.

To view the article, please visit the Stepping Stones page on the online Arts & Activities magazine.


Wednesday, December 5, 2012

It's Not the End of the World! Aztec/Mayan Calendars with 5th Grade


Since we've been hearing a lot about the "End of the World" due to the Mayan calendar, I thought it would be funny to create a project inspired by that particular calendar...close to the date of the end of the world!!!!

Here are the materials you need:

-Round 9" or 10" cardboard circles
-A large bag of foam shapes
-Glue
-Black Paint
-Gold Paint (this can range in price)
-Pencil

The main idea for the project was to introduce radial symmetry.  I began by showing the students a self-created Powerpoint about the Aztecs and the Mayans.  I explained a little bit about the calendars and planning of the days for planting and rituals.  Next, I focused on the design of the calendar. I showed the students how to create radial symmetry with the cardboard circle by asking them to imagine a pizza with four slices, and each slice of pizza looks exactly the same.  My students have a habit of viewing their projects in one way:  the paper in front of them.  When I show them the circle, I tell them that each way the circle turns, the design would remain the same...making it radial symmetrical.

Now it's time to work with the materials!


I used a pop can box to store the shapes for each table!  Pie tins also work too (I use them at my second school).


Trick: Tell the students to worry about finding the same shape and size, and NOT to worry about color.  They'll be painting over them anyway.


Trick: Have the students draw an "x" on the circle to separate four slices to fill.  This will help the students design their slices to look the same each time they turn the circle.


Make sure to tell the students to cover every nook and cranny with the black paint.  It helps with the last step of the project, which is to cover again with gold!

I have students use just their fingers to rub the gold paint on top of the black paint, giving the project an "ancient artifact" affect to the project.


Heads up...the circles will curl if students put "too much" paint on.  Just letting you know what to expect!


Some students wanted to just fill the entire circle with symmetry instead of filling the middle with a face.


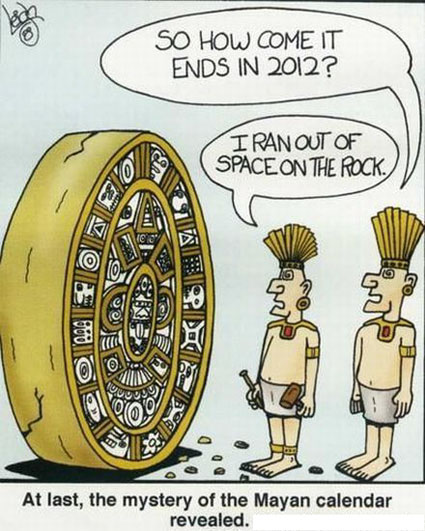
                    Here are some cartoons I shared with my students.  They thought it was funny!


Friday, November 30, 2012

Art Meets Literature: The Joys of Van Gogh's Cat


Last year, I found the book "Van Gogh's Cat" at our scholastic book fair.  I was excited to see that the book was written and illustrated by 2nd grade students in Muncie, Indiana.  I loved seeing how the students created their own artworks of famous art masterpieces, and created cats jumping out of each page.  I now own about 8 copies of this book: one at home for my daughter, 3 at my second school, and 4 for my home school.  You can say I want my kids to see the book everywhere!  After searching on Pinterest, I saw many lesson ideas inspired by the book too.

I decided to create a lesson inspired by the 2nd graders who created "Van Gogh's Cat.".  I wanted my students to create a picture inspired by a famous masterpiece, then have a cat jump out of their own picture.  I set up folders with colorful images of many famous artworks, and shared them at each table in my classroom.  The awesome part was that none of my students fought over pictures, shared without complaint, and didn't choose the "easy" pictures!

After the students created their pictures (I just used markers and colored pencils on 9" x 12" paper), I had them trace a cat shape on the back of their pictures, then attempt to cut the cat out without cutting from the edge of the paper (for those who were afraid to attempt it, I just pinched a cut in the middle of the paper to start them off).  The students then glued their picture on one side of 12" x 18" paper, and their cat on the other side.

After my students created their pictures, I felt that the school needed to see how I combine art and literature.  I decided to create a bulletin board to share what the students learned, what they created, and a little information about the artist.  Here's my results:


I needed something to draw everyone's attention in the hallway.  If the superintendent or curriculum director walked by, I wanted them to stop and read.


Van Gogh's "Starry Night."  Of course we needed this one...the book was called "Van Gogh's Cat" after all!!!


Henri Matisse's "Fall of Icarus."  It's fun to explain to students that not all body drawings have to be perfect.


Claude Monet's "Bridge Argenteuil."  I'm so glad a student picked this one!  It shows that he liked teh composition more than choosing something easy or abstract.


Piet Mondrian's "Composition with Red, Blue, and Yellow." One of our BIP students created this one, and I loved how he focused on the work!  He loved the bright colors and filling his the space.


Andy Warhol's "Campbell Soup."  I'm glad I found a chance to share multiple artists with this project.  The students loved the idea of choosing their own.  I'm very happy that some students wanted to take on the challenge of drawing multiple cans, and they never gave up!


Georgia's O'Keefe's "Red Poppy."  Great composition, and beautiful craftsmanship with this challenge!


Alma Woodsey Thomas's "The Eclipse."  I love talking about Alma's abstract work...so much that I introduce her to two different grade levels!

Monday, November 19, 2012

Turkey Puppets!!!!!!


Kindergarten students have the most enthusiastic reactions when they see what project they will make.   The project that gives the most reaction is always the turkey puppets.  At this time in their art journey, I begin pushing the drawing and cutting skills  a little more by creating challenges.

In the beginning of the school year, I start with assemblage and proper use of materials, such as how much glue to use and placement of pieces to create an artwork.  Drawing is then introduced with using simple shapes to create artworks.  Then comes the scissors.

The kindergarten in my district come from many diverse backgrounds.  Some have used scissors and know perfectly well how to use them, and others need that little extra help in handling scissors.  Once I feel they are ready, it's close to Thanksgiving time, which is a grand time to bring on the turkeys!

Here is the list of materials I use:

-Brown paper bags (trimmed down for kindergarten hand sizes)
-Glue
-Scissors
-Pencil
-Black Marker

(Cut a mass quantity of each for your current amount of students, plus save some for next year so you know which sizes to cut!)

-Dark brown colored paper cut down to 4" x 5" size
-Yellow colored paper cut down to 2" x 2" squares (for beak and feet), then more at 1.5" x 5" size (for feathers)
-Red colored paper cut down to 2" x 3" size (for waddle), then more at 1.5" x 5" size (for feathers)
-White paper cut down to 2" x 3" size
-Blue, Green, Purple, and Orange colored paper cut down to 1.5" x 5" (for feathers)

Start by showing the students which side is the back and front.  Since paper bags have flaps, I call that the backside since the flap can ruffle the tail feathers.  After the students write their names, I show then which shapes to draw on the paper:

Dark Brown Paper:  Draw a big oval first, then cut out.  This part is the body.

White Paper:  fold paper in half, draw circle, then cut the circle out, which makes two since the paper was folded!  This part is the eyes.

Red Paper:  I tell the students to cut out any funny shape they want.  They like that!  This part is the waddle.

Yellow Paper:  I tell the students to just cut a corner off a square, and they get a triangle!  That part is the beak.  Take two more squares, draw a circle on one, then cut out two squares at the same time, making two circles!  This will be the two feet!

Red, Green, Blue, Orange, Yellow, and Purple Strips: These are the tail feathers!  Have the students glue one at a time on the back flap, then voila!  You have a turkey puppet!

Use the black marker to draw pupils in the eyes.

This project should take only one class period.  If you have overachievers, show them how to trim the feather to look more feather-pointed.  More details can be added.


                     (I thought this one was cute!  She decorated the turkey in a field of flowers!)

Friday, November 16, 2012

Giving Thanks for Art

It's that time of year to give thanks for what we have, not to dwell on what we want!  Here's my Thanksgiving list of things I'm thankful for:

I am thankful for a classroom.  When I traveled to three schools, having at least one classroom was helpful.  It was my home base, and the place I stored most of my materials.  Now I travel to two schools, and there is a classroom at both.  I do miss pushing the cart because I enjoyed being a part of the classroom and seeing my co-workers.  I know it sounds weird!

I am thankful for my co-workers.  Even though going from one school to another is tricky, I'm happy to know I have friends wherever I go.

I am thankful for a budget.  I have friends that teach in schools with little to no money for art supplies, and I try to give when I can to help them out.  With the budget that I have, I am able to create a decent curriculum to bring everything about ART to my students.

I am thankful for a staff that doesn't look at me like I'm a plan period.

I am thankful for administration that communicates with me.  Because I travel and was unaware of alot going on my first year, I vocalized my concern for wanting to know what was going on!  Now I know when students transfer in/out, when a field trip or assembly happens, or even when a contest happens in the district!

I am thankful for my students.  When they walk into my room, I don't hear a single complaint.  Instead, I hear, "What are we making today?" or "I showed my project to my family and they hung it on the wall!"  I am also thankful for their enthusiasm, their participation, their pride in being responsible, and their high fives in the hallway.

I am thankful for my art education colleagues.  Yes, you guys are awesome.  I love how we share ideas, stay active in the arts community, and how we are advocates for the arts in education.  You rock!

I am thankful for ART.  I love my job.  Enough said.

Please take the time to think of what you're thankful for.  And if you can't, think of ways to make your situation better for you.  You spend most of your time during the day at work, away from your family.  Make that time enjoyable for you!

Thursday, November 8, 2012

Revisiting "Pros and Cons: Balancing the Scales While Traveling to Multiple Schools"


My third article is published!  This month, I focused on the pros and cons of traveling to multiple schools and pushing a cart from room to room.  I wanted to share how even though you may feel like you're being pushed around or struggling with storage and materials, there are positives to each situation.  I am very thankful that Arts & Activities shared my advice with fellow art educators, and I hope to continue to work together with colleagues to strengthen our practice and be advocates in our field!

To view the article, turn to page 12 here.