George Rodrigue was a Louisiana-based artist known for his trademark "Blue Dog" characters in all his paintings. Sadly, George was diagnosed with stage 4 lung cancer in October 2013 and passed away in December 2013. He is known for his creation of the Blue Dog series of paintings, featuring a blue-hued dog.
Wikipedia states that George used the shape and stance of his deceased dog named Tiffany and was primarily influenced by the loup-garou legend (the first painting in the series), which holds the title "Watch Dog," painted for Bayou, a book of Louisiana ghost stories. The blue-hued, ghostly spaniel/terrier is often featured with a white nose and yellow eyes.
"The yellow eyes are really the soul of the dog. He has this piercing stare. People say the dog keeps talking to them with the eyes, always saying something different. People who have seen a Blue Dog painting always remember it. They are really about life, about mankind searching for answers. The dog never changes position. He just stares at you. And you're looking at him, looking for some answers. "Why are we here?," and he's just looking back at you, wondering the same. The dog doesn't know. You can see this longing in his eyes, the longing for love, answers."
-George Rodrigue on the Blue Dog
Materials
-Pencil
-11" x 14" canvas
-Acrylic Paint
-Brushes
-Water
-Water Container
-Paper Towels
-Images of George Rodrigue's Blue Dogs
-The book "Why is Blue Dog Blue?"
Objectives
The students will create their own paintings similar to the style of George Rodrigue's "Blue Dogs." Students can choose their own background and their own color for the dogs. The students will learn the term "monochromatic" while painting the dogs.
Directions
This project was created during one class which was 2 hours in length. We began the project by reading the story "Why is Blue Dog Blue?" written by George Rodrigue, and went over the different colors the artist changed for his trademark dog image. After reading the book, we started drawing the dog step by step. Here are the steps I took in creating the dog:
Step 1: Draw the nose
Step 2: Draw the white spot
Step 3: Draw the eyes
Step 4: Draw the head
Step 5: Draw the ears
Step 6: Draw the front and back legs
Step 7: Add the details
The details consisted of adding fur to the ears, points in the eyes, and marking the different colors within the dog (where it would be light, dark, or the base color). This step, with reading the book, took about 30 minutes.
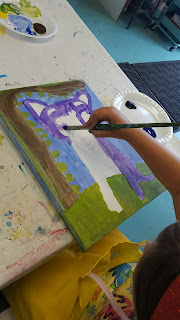
After drawing the dog design, the students began painting the background color. The students were encouraged to choose their own background, and all three wanted the blue sky and green grass. Once the background was painted, they were asked to fill in their dog with the color they chose. The only areas they were asked not to paint were the eyes, inside of the ears, white spot, and the nose. After applying their base color, we mixed the colors with a touch of black or brown to create the darker tone and added patches of the shadows. Once finished, we added a touch of white to the base color for the lighter tones. We then filled in the white spot on the face. These steps took around an hour to complete
For the last half hour, students were asked to trace their dog with black paint, using a thin brush. We filled in the eyebrows, cheeks, shadows, and ears, while tracing the entire dog's outline. Once completed, students had time to touch up any areas needed!
Here's the finished example I made for students to follow along:
Here are my students' finished projects!


No comments:
Post a Comment