


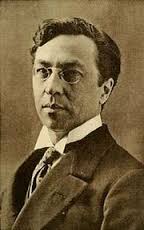
Wassily Kandinsky was a Russian painter who is known for his abstract paintings with shapes and lines. Kadinsky said that "Music is the ultimate teacher," and created a series of composition pairings in the 1930s. In his early years, he stated, "Color is the keyboard, the eyes are the hammers, the soul is the piano with many strings. The artist is the hand which plays, touching one key or another, to cause vibrations in the soul (Kandinsky, Wassily (1911). Concerning the Spiritual in Art. translated by Michael T. H. Sadler (2004)."
One of my favorite projects with my 2nd graders is my Kadinsky-inspired line and shape paintings. The students love how music can help inspire any artwork, especially with abstract designs. Prepare your Pandora account with some early Jazz tunes and start getting your materials together!
Materials
-10.5" x 16" white paper (60 lb. or heavier)
-12" x 18" colored paper (for frame)
-pencils
-black and colored markers
-tempura cake paints
-paintbrushes
-newspaper
Objectives
Since students have prior knowledge in identifying different shapes and lines in art, I ask the students to create an abstract painting using the shapes and lines they know. As inspiration in creating their pictures, I play music in the background to encourage their creative thinking. Students must fill their paper with the shapes and lines, leaving little negative space.
On day 1 (40 minute class), I introduce the artist with a Powerpoint showing his artworks. I also show a few composition paintings to show the difference in painting styles with fast and slow music.
For example...

This painting demonstrates crisp lines, filled in shapes, and and precision. This painting appears to have been made while someone was listening to music with a slower beat.

This painting is more chaotic, dramatic, and quick. This painting appears to have been made while the artist was listening to music with a faster beat.
For the rest of class, the students use a pencil to draw in their abstract picture while listening to Early Jazz music in the background. In the early 20s-30s, Jazz and Ragtime was the popular music at that time, so I encourage students to try and create to the same type of music Wassily would have listened to. If students finish their drawings early, I can easily put out the tempura cake trays for beginning painting.
Day 2 is mainly for painting. I encourage students to fill in their spaces with different colors and to complete the background (negative space) with colors as well.
Day 3 is for refinement and framing. Since you can't use a marker on wet paint, all students should be at the same step in the lesson on this day. Students can use black or colored markers to trace their shapes and lines, which helps enhance the painting. To finish, students glue a colored paper to the back of the painting for a frame.


Here's a video I like to show students before starting the project!


