Monday, December 4, 2017

Mixed Media Mania: December's Stepping Stones


Creating artworks with multiple materials are some of the most memorable projects a student can treasure.  There’s so much experimentation in the process, and opportunities to integrate other ideas within the project creation.  Mixed media is defined as an artwork created with more than one medium.  Common mixed media projects are altered books, artist trading cards, collage (assemblage), quilt art, and inter-media.  Many mixed media techniques are experimented in the upper grade levels, but can also be used as early as Pre-Kindergarten.

When I think of mixed media, I think of STEAM because there is a great opportunity to tie in science, technology, engineering, and mathematics in the finished artworks.  When coming up with a mixed media project, there are a few things to keep in mind when designing and executing the lesson.  I must confess that some of the tips to be shared were learned by experimentation.


Browse your materials.  Some of the most common mixed media projects require the simplest of materials, such as crayons to watercolor, or Mod Podge for assemblage.  Take the time to go through your collected materials and research what art medium can work with others.  I recommend browsing art education blogs with lesson ideas or visiting websites of art supply companies that list multiple mixed media lesson plans.


Experiment with what you have.  If you have a wonderful idea using multiple materials for your students’ finished products, know what works together and what doesn’t.  This is where it’s always best to create your finished example before executing the lesson.  It’s good to learn first hand what materials can be water resistant or bleed colors when wet.  Document what steps are involved in the process.  Are you incorporating technology?  Do you plan on having students create beginning designs of their products before executing the final piece?  Are there precise measurements involved?  Practicing these steps and performing your experimentation will help you execute the lesson with better ease.


Explore multiple techniques.  Assemblage and resist are two of my go-to techniques with younger grade levels.  My younger students are always interested in the magic of crayons or oil pastels resisting watercolors or tempura paint.  It is also fun to assemble multiple images or drawings and add more elements, such as paint, gel markers, or even air-dry clay for 3-dimensional pieces.  My older students enjoy altering materials, like playing with torn paper, adding images in collage, or painting over found objects.


Know there will be successes and failures.  In my 11 years in education, I have had a few lessons that have been tossed out or heavily modified.  One of my most memorable examples was when I started my “stained glass” tissue paper project with 6th grade.  I wanted to create a glass effect using tissue paper on clear vellum, and applied black glue to trace the images, which made the glass designs stand out.  When I first started the project, I learned that regular glue was not the glue to use to apply the tissue paper. After many projects dried, the vellum and the tissue paper peeled apart.  I also learned that with using the black glue, projects needed to be dried flat and not on the drying racks, or else they would leak.  I learned that Mod Podge did the trick and created a shiny effect with the tissue paper.  If you start a project off from scratch, you will find out what works after playing with new materials with your students.


Organize the chaos.  Working with multiple materials can be fun and exciting, but when you work with different media (especially when you’re on a cart), you need to keep a stricter eye on the creativity in the room, especially is you have limited amounts of items to use.  I always need to keep this in mind when using feathers, beads, pipe cleaners, or other embellishment materials.  Students want to cake their projects with every bead available, but when the last class is ready to start their project, you end up running out.  Make sure to divide the materials available with all your classes.  There are some projects where I encourage students to pick up their own embellishments, which makes the product more exciting and personal for the maker.  Also, when working with an abundance of materials, allow for additional clean-up time with younger grade levels. 


Enjoy your students’ amazing products!  When the artworks are completed, have the students reflect on their process!  You can achieve this through artist statements or critiques.  You can also have the students talk about the steps used in creating their artworks.  In an open critique, ask them how they felt about the process and finished product. 


Enjoy your mixed media projects with your students!  The are some of the best artworks to make with your students!

Monday, November 20, 2017

Abstract Felt Collage Inspired by the artworks of Wassily Kandinsky


As the author for the Stepping Stones column, I recently shared that some of my favorite lessons to teach were fiber arts based, but with the time crunches and challenges with storage, I was not always able to work with the materials in a traveling setting.  I did manage to work with yarn, fabric, and other natural/synthetic materials here and there in the past, but like any enthusiastic art teacher,  I wanted to incorporate more within my classes.  There are plenty of projects in blogs and social media sites that have caught students’ interests with weaving, sewing, and other craft traditions, and it makes my heart melt to see all the exciting projects shared!

While pondering the concepts of abstract art, I developed an idea to introduce a felt project with my 4th grade students.  When they were in 2nd grade, they had learned about abstract art and design, but now a few years older, I wanted to revisit the concept by viewing the painting creations of Wassily Kandinsky.  Wassily was a Russian painter who was inspired by jazz music, which is evident in the shapes, lines, and colors applied in his abstract paintings.  


Materials
-9 x 12 styrofoam
-9 x 12 felt sheets of different colors
-Scraps of colored felt
-Stencils of different sized circles
-Markers
-Felt Glue

Objectives
4th grade students will:
-Identify how movement is shown in abstract art created by the artist Wassily Kandinsky
-Demonstrate how to create an abstract artwork with the use of felt

Standards
Creating: Explore and invent art-making techniques and approaches. 

Math Integration: Draw points, lines, line segments, rays, angles (right, acute, obtuse), and perpendicular and parallel lines. Identify these in two-dimensional figures

Directions

On the first day, we began by looking at paintings created by Wassily and discussing how we were able to see the movement within his shapes and lines in his paintings.  In Youtube, there is an animated video called “The Kandinsky Effect” by ManuMeyre that demonstrated how jazz music could influence the way a painting can be created.  The animation was based off of Wassily’s painting “Composition VIII.”  Afterwards, we viewed slides of Kandinsky’s artworks. The students had a blast pointing out paintings that appeared to have been made during a slow or fast-paced moving song.

After talking about how Wassily’s paintings were created with the influence of music, we moved on to discuss how the same idea could be used by creating an abstract collage out of felt and yarn.  This was when the students’ eyes opened up and the questions were flying.  Since it was a new materials for the students to work with. Their curiosity was peaked.  One of the things I like about working with felt is that it’s very forgiving.  The material is easy to cut, plus you can arrange your pieces together before gluing anything down.  Students were asked to create their own abstract collage using the felt and yarn provided.  With this being a new material, students were to explore how to design their pieces before gluing pieces down.  As an added bonus, we listened to music in the background to help inspire their designs!

In demonstration, I reminded students about foreground/middleground/background of layers.  Students were shown how even in Wassily’s paintings, shapes and lines were painted down in layers.  Shapes can overlap or converge to make different shapes!  For the rest of class on that first day, students began drawing and cutting out the shapes for their abstract designs.  They were given a full sheet of felt to glue down on a piece of styrofoam for stability, which also made it much easier for storage on the drying rack for clean-up.  Another tip was with using markers to draw their shapes.  Remind your students not to press hard with the markers when drawing, which can bleed through the felt and show up in the finished products.  


On the second day of class, we revisited Wassily’s work and focused on the lines used within his paintings.  In Composition VIII, Wassily used multiple bumpy and wavy lines to help unify the space in his work of art.  To create the lines in the students’ artworks, we used yarn to bring out some of the shapes and lines within their artworks.  If you’re interested in integration with math, you can identify line segments, rays, angles, perpendicular, and parallel line used within the artworks.

One of the things I noticed with the students was that they love using symbols and shapes they are familiar with.  Here and there, emojis were popping up, flag designs from their heritage, a poke-ball, and all while having fun creating their own designs.  These little pop up designs did not go against any object and I likes seeing how the students enjoyed adding their own little elements to their artworks.  


On the third and final day, students added their finishing touches.  It was their choice whether or not to add a felt frame or additional shapes/lines.  To wrap up the lesson, students described what influenced the creation of their pieces.  Was it the music they listened to in class?  Did they share their interests in their abstract designs?  Writing about their artworks is a good way to have them reflect on their development of their creations!  

Overall, the students had fun!  They talked about how much they enjoyed working with the felt material and creating their own designs.  Students would comment in the hallway how much they couldn’t wait to get back to art to continue their pieces.  If you have a pile of scrap pieces of felt that need to be used, this is a great project to use all your recycled pieces!


Friday, October 27, 2017

Ways to Use Photography in Your Art Class: November's Stepping Stones


Photography is a very important part of the visual art curriculum, and is often overlooked due to lack of resources.  Since the development of the daguerreotype process in the 1820s, photographers have been able to capture integral moments in history and expand upon the photographic process. Fast forward to today, where due to smartphones with cameras, photography has become such a normal part of our daily lives.

Photography has been difficult to achieve in many art classes at all age levels.  Many schools lack the resources for students to have their own cameras (either film or digital), as well as the means to edit and produce the photographs (darkroom or printers).  Even if we wanted to use cel phone cameras just to learn and practice the perspective and angles to take the shots, many schools do not allow phones while school is in session.  So the question is with the challenges faced, how can we incorporate photography in our classes, especially at the elementary and middle school levels?

Have discussions about photography.  Even if the process and production isn’t there, talk about how photography is art.  Talk about how photography changed the world, or how it documents history.  Talk about perspective, angles, lighting, and space.  You can even create a game of identifying photography vocabulary with images.  Having students know the photography vocabulary when taking their own photos is better than not knowing how to use their eye when capturing a moment in time.


Play with sun sensitive paper.  This type of paper can be found in many art supply catalogs, and is an easy way to explain the exposure process to your students.  Since the paper creates a positive/negative images in a small amount of time, you can have students design their exposed spaces to demonstrate elements/principles, such as patterns, balance/symmetry, value, etc.  You can also play with different light sources and the effect that various exposure times show in the process.  Since water is used to help process the finished exposures, it’s the simplest process for elementary students.

(The world's largest cyanotype)

Explore more of the cyanotype process.  You know the sun sensitive paper you just read about?  The paper is used for cyanotype prints.  There is also a more intense process involved that, depending on the materials available, can be accomplished with middle or high school students.  I recently came across a blog called obscura-works.com that shared a class project.  The author had created a large queen-size bed sheet cyanotype by soaking the sheet in cyanotype solution at home, then having volunteers help in covering the sheets before exposing it with students lying on top for a selected time.  The finished result was an amazing sheet with student silhouettes hung for display!


Create a pinhole camera.  There are many websites you can search that share how to create your own pinhole camera using shoeboxes or Pringles cans.  You may not be able to have a photograph product, but in making the pinhole camera, you can have students observe how the exposure process is achieved.  If you teach middle or high school students, you may have resources available to be able (such as a school darkroom or local photographer) to process photo paper for show box pinhole cameras!

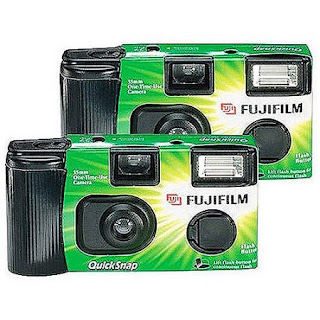
Find a use for your old film camera.  Do you still own a film camera that you no longer use?  Why not have your students see what it’s like to snap a photo with film?  Load a roll of film or two and have each student snap a photo.  This is only an option if you have the camera lying around and no longer wish to use it.  You can also purchase a disposable camera for this option as well!  After taking the film in to be developed, share the photos with your students and have a critique about the their captured moments.

Tablets Available?  Explore the camera options.  If you have access to tablets (but not for digital cameras), consider experimenting with the camera option.  Tablets are more portable, so students can move more around the room or school.  Tablets could also contain apps that can manipulate photos that have been taken and can teach more about the editing process.

When in doubt, look for used.  There are many digital cameras that are still in good, working condition and sold for resale.  In purchasing digital cameras, you can gather some that are even a few years old, find memory cards at an affordable price, and keep them in your classroom for student use.  Older digital cameras can still connect through USB ports and print out in your classroom printers, if available.

Even with no darkroom or access to top notch cameras and printers, you can still bring elements of photography to your students at the elementary level!


Thursday, September 28, 2017

Preparing Lessons for a Sub: October's Stepping Stones


In the beginning of the school year, our main focus is on creating procedures and designing curriculum for our students’ needs.  One of the items on our set-up list is our plan in case of absence; in case you get sick, or get called to a meeting during school hours, or use a professional development day, even if you take a long term leave due to family/health reasons.  It is important to have a back up plan prepared in case you are not available for your students because most substitutes, while walking in blind, may not understand what your individual classroom procedures are.  To start this, you need to create a plan for a substitute teacher to utilize.

Start by deciding on your sub packet storage, like a tub, folder, or file system. Your sub packet should be simple enough for a substitute to locate and utilize when first walking into your classroom.  When I taught from a cart, I had a tub of materials that was clearly identified in my work closet and easy to carry from room to room.  In my current classroom, I have a full file drawer clearly identified with bold letters for my sub plans for each class every day of the week.  You should design your sub storage to fit your needs, but make sure you label it clearly for substitutes to find once they walk into your space.

Details are important.  Your school or district may have mandatory information packets to add into your sub materials, such as floor plans, emergency procedures, forms, and school mission/rules.  Additional materials that are essential for a substitute are your daily schedule, class lists, seating charts, typed out classroom rules/procedures, nearest classroom contact information, and information regarding students (504 plans, IEPs, etc.).  Substitute teachers should always have student information handy in case of emergencies, especially when it comes to medical concerns or student adaptations.

Decide on what materials you want the substitute to work with.  In my elementary classroom, the crayons, colored pencils, and markers are the main materials used in my art library, and I clearly mark which materials to use with each grade level in my plans.  I prefer to stay away from scissors and glue because there is extra care involved with prepping and drying.  Using simpler materials does make it more manageable for the substitute and it’s easier for you when you get back to your classroom.  For middle and high school, projects are more detailed and may require more advanced materials to work with.

Be sure to prepare for emergencies.  It is always best to plan sub lessons in advance when you know you’ll be out of school for a period of time, but it’s not always easy to plan for the last minute call-ins.  I remember the day I had to rush my daughter to the ER in the morning instead of heading to work!  When events like this happen, your first priority is yourself and your family, but planning ahead makes these hiccups more manageable.  Within your sub file, create “emergency” lessons that are simple and easy to execute.  There are different types of easy activities that require little material usage.  In many art supply catalogs, there are books available within the resource section that contain simple art activities, such as “creating a city with simple shapes,” or designing a drawing using words.”  There are also fine art-themed coloring books that have descriptions about the artworks.  If you struggle trying to find additional activities, you can browse the Teachers Pay Teachers site, which offers many activities you can either pay or find for free.


Prepare lessons for pre-planned off days.  If you know you will be out of the classroom in advance, it doesn’t hurt to pre-plan a lesson that any substitute can work with.  The best pre-planned lessons I’ve used were simple directions with pictures to follow along.  I also had a finished product created as an example for students to see.  Make sure the project size is manageable and easy to store away in your sub plans.  Ideas for sub projects have been shared by multiple art bloggers and found on Pinterest, Teachers Pay Teachers, and in the art education social media groups. 

It is hard to place your classroom in another teacher’s hands while you are away.  With careful preparation and attention to details, you will find that most substitutes will follow your directions with ease.  I find it important to create open communication with the substitutes that come into my room while I am away. Try leaving a note of thanks and leave a page for them to fill out in return.  Collegiality is important, even with those who support our classes while we ar