Showing posts with label Assemblage. Show all posts

Tuesday, July 7, 2015

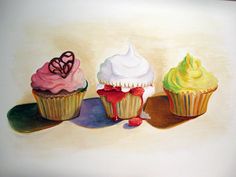
Summer Workshop Series: Wayne Thiebaud-Inspired Cupcake Collages

This week I entered new territory in my teaching career.  For the first time since student teaching, I worked with high school age students, and it was a wonderful experience!  

The project we created was a "cupcake collage."  To take a quick step back, when the studio owner and I sat to plan our summer projects, she had the idea to create cupcakes with magazine paper.  I immediately thought of Wayne Thiebaud's dessert creations and thought it was a good tie-in with artist-inspiration!

Wayne Thiebaud is currently 95 years old!  Here's a few pictures of him and his artworks:


Materials
-16" x 16" illustration board
-A ton of magazine pages (it's best to separate the pages, and if you have time, the colors)
-Mod podge
-Brushes
-Pencils
-Scissors
-To water down the mod podge, add a hint of water to about a 1/4 cup of mod podge.  It helps the glue spread and soak into the magazine paper.

Objectives
This project was designed for ages 14-16.  Students will create their own cupcake collage using magazine paper.  They will demonstrate value by showing highlights and shadows within their artwork.

Directions
The project was completed in a 2 day summer workshop (2 hours each class) through Pastiche Studio.

On day 1, we began by looking at images of Wayne Thiebaud's paintings and identifying how the artist created highlights and shadows within his dessert designs.  We especially looked at the cupcake designs to see how Wayne had emphasized his colors to create the values.  I also shared my finished example with the students and explained how the magazine photos can help in creating the highlights and shadows needed for their artworks.


Each students was given an illustration board as their canvas.  We went over how to draw the cupcake wrapper and icing step by step and sized our drawings within the board.  I especially loved how each students chose a decoration for the tops of their cupcakes!  When they were ready to start gluing down the pieces, I explained how we needs to start with the background first and add the layers on top.  I explained to first brush the glue onto the illustration board, place the paper on top of the glue, then spread another layer of mod podge on the paper to flatten down.  Sometimes the magazine paper curls up and needs to be flattened!

Since this was my first time teaching this age group in a few years, I under-estimated the amount of time it would take to complete the background.  I was observing the students and how they paced their time gluing around the cupcake and finding the exact colors needed for the table and the back color.  During the second hour on the first day, I was tearing out pages with colors the students needed to save them time on searching for colors.  So, if you decide to create this project with your students, a huge time saver is having the magazine pages ready in advance!  Sometimes we learn the hard way!


This was the stage we were at after the first day of class.  Table completed, background not as much, but we pushed harder on day 2!


On day 2, the students completed the background within 20 minutes (after I pulled out the colors needed from the magazines).  We then started on the cupcake!

I demonstrated to the girls how to find a magazine image they liked for their wrapper.  They placed the magazine paper on top of their cupcake wrappers and sketched an estimate of size around the space they needed.  I mentioned to the students to trim out the shape larger than they needed in case they traced too small.  Next they glued the entire shape down, as seen below:


For the next step, they found another image that would represent the highlight or shadow of the cupcake.  The students were asked to cut the image into strips with points, then glued down spaced apart.


Now time for the icing!  The students were asked to find a highlight, medium, and shadow of the same color hue.  In most cases, white worked as the highlight.  We trimmed out and glued down the shadow first along the bottom of each icing layer.  Next, the students used the "estimation" trick I shared with the wrapper to cut out the icing medium color for the entire layer.  Once the oval shapes were cup out, they were able to trim down to fit their space.  Lastly, they drew and cut out a skim my teardrop shaw for the highlights of the icing.


For the last step, students filled in their cupcake topping decorations and viola!  Finished cupcake collages!  And they all finished right on time!  I was SO proud of them!!!!


I can't wait to do it again!  If you collect Art News magazines, they have tons of artworks and painting that can be used as textures in your collages!

I went through Pinterest and found that this process has been done before, and I'd love to share what pins I have found.  I would love to try a similar project with the younger grade levels I teach.  I also found a contemporary artist from Texas named Nancy Standlee, who creates cupcake collages too!

Thursday, July 2, 2015

Summer Workshop Series: Winslow Homer-Inspired Pirate Ships


Winslow Homer (1836-1910) was an American painter known for his seascape paintings.  When looking through his artworks, we see cloudy, windy skies, waves in motion, and dulled colors.  When we browsed through project examples, I came across a project from Deep Space Sparkle that inspired the summer workshop project for this lesson.


Materials
-14" x 16" 70# white paper
-10" x 16" white poster board
-Blue, black, and white tempura paint
-Brushes
-Water
-Water containers
-Your fingers
-Colored construction paper
-Scissors
-Glue
-Pencils
-String
-Images of ships for reference

Objectives
The students will create their own mixed media sea scape using paint and assemblage of paper.  They will create foreground, middle ground, and background in their seascapes.  This project was created for students ages 6-9.

Directions
This project was completed during one studio class in a 2 hour length of time.  We started with creating a paint wash sky on the 14" x 16" paper.  We used blue for the sky, then painted in white and black strokes to blend in for cloudiness.  Once the paper was finished, we put it aside to dry.

Next, the students created wavy texture on the poster board using their brushes, then their fingers! These two steps took about a 1/2 hour to complete.


Once the poster board was painted, we put it aside to dry.

We then created our pirate ships/sailboats using colored construction paper.  Here are a few examples I found on Google and shared with my students for ideas in creating their ships:


Construction of the ship took around 45-50 minutes to complete.  Once the main body of the ship was completed, the students took their "mostly dry" sheet of poster board and cut four strip apart.  Each strip was sit to resemble waves in the water.  We then glue down each layer, placing the boat in between the wavy layers.


Once the layers were glued down, students created the mast, sails, and glued down the roped using string or yarn!

Here was the example I made to share with the students:


And here are my students' amazing creations!


Thursday, October 30, 2014

3rd Grade Perspective Pumpkins


During the fall season, I like to tie in our love for pumpkins while reinforcing the idea of perspective!  In the beginning, I share with the students a picture that demonstrates foreground, middle ground, and background.


Objective
The main objective is for students to demonstrate their knowledge of perspective using foreground, middle ground, and background within their pumpkin patches.  Adding Halloween elements are optional since not all students celebrate the holiday.

Materials
-10.5" x 16" dark blue paper
-5" x 16" dark green paper
12" x 18" orange paper for frame
-thin cut black paper strips
-orange paper for pumpkins
-green paper for leaves
-yellow paper for stars
-brown paper for stems
-black marker for pumpkin lines
-pencils
-glue
-scissors
-brown or green yarn

Directions
On the first day, I start by explaining to students how to start with the background first.  Students add the dark green paper (ripping the edge for a rough, grassy hillside or cutting a wavy line), then add the black strips for fencing.  Students can create whatever style fence they wish.  We end the class by adding stars in the sky and a moon to shine on the pumpkins.

On day 2, students start adding the pumpkins.  I inform the students that we need at least 6 pumpkins in three different sizes to show perspective, small, medium, and large.  Students should place the pumpkins where they would show near or far in their projects.  Once pumpkins are complete, students can add the yarn for vines and leaves to cover the vines and pumpkins.

Day three is to add final touches, drawing the lines on the pumpkins, or adding additional decorations, such as ghosts or pumpkin faces.


Monday, July 28, 2014

Matisse-Inspired Cut-Out Animals with 2nd Grade


Henri Matisse is considered one of the most influential painters of the 21st century, and one of the leading Modernists. Known for his use of vibrant colors and simple forms, Matisse helped to bring in a new approach to art.  His style of painting is known as a "Fauvism," which means wild beast.  Later in his life, Matisse began to create cut out paper artworks, which are wonderful examples to share with 2nd grade students.  With this project, I combine matisse’s cut out style with animals in their environment.  Students choose their own animal, and create the background to match which environment that animal lives in.  Encouraging details helps students to identify the parts of the animal and the objects that would reside in their environment.

Materials
-10.5" x 16" light blue paper (or dark blue, depending on the time of day)
-12" x 18" colored paper for frame
-colored paper scraps
-scissors
-glue
-pencils

Objectives
(Science Connection) Students will discuss animals and the environments they live in.  They should demonstrate their knowledge of animals and their environments by creating an artwork displaying an animal in its habitat.

(Art) Students will construct an artwork by using geometric and organic shares.  Students will also demonstrate perspective by creating the background first, and working their way toward the foreground.

Directions
I love this project because I'm able to use all the scraps I have collected over time.  I begin the project by briefly discussing animals in their habitats.  SInce Kindergarten, students have plenty of prior knowledge of where animals live around the world.  Next, I tie in the style of paper cutting by the artist Henri Matisse.  Once students see that famous artists have worked with materials they have worked with before, they are eager to try it out themselves.  

(40 minute class periods) Day 1: Start by having students create the habitat for the animal, which would be the background.  Explain what would be needed for the sky and ground.

Day 2: Give examples of basic geometric shapes used to make the main parts of the animal. Have students draw and cut out the big shapes first, the add the finer details on top.

Day 3: Final wrap up day for details!  Do the students have a sun or a moon? what about different colors for the water to show waves?  Does the animal have whiskers?  Spots? Stripes?  Once they're finished, add the 12" x 18" colored paper for a frame!

Here's some of the finished examples!  As many times as I say "no corner suns," they still sneak it in!


Friday, July 25, 2014

Rousseau Jungles with Kindergarten


Henri Rousseau was a French painter, who’s jungle pictures are an combination of memory images of his Mexican trip, visual experiences from visits to botanical gardens and zoos, and depictions of plants and wild animals he had seen on postcards and in photographs. 


Materials
-10.5" x 16" light blue paper
-12" x 18" colored paper for frame
-cut strips of brown paper
-pre-cut triangles of different shades of green paper (cut strips of 3" paper, then use paper cutter or scissors to slice diagonally for quick triangles)
-pre-cut squares (approx.  3" x 3") of greens, yellow, and/or orange paper
-pencils
-glue
-scissors
-white paper
-black marker
-colored pencils or markers


Objectives
(Science Connection) Students will identify animals that live in the jungle, as well as the plant life that grows in the jungle environment.  Inspired by the paintings of Henri Rousseau, students will create their own jungle scene and hide animals within their environment.

Directions
This project can take about 3-40 minute class periods to make.  

On the first day, the students and I look at paintings by Henri Rousseau and identify the plants and animals in the jungle.  We then discuss how to create the jungle scene, starting with the plants and trees.  For the remainder of the class, students trim and glue down trees, branches, tree tops, tall grasses, and if time allows, a sun and fruit in the trees.

On the second day, I share ways to draw the animals using simple shapes.  Students choose at least 3 different animals for their picture, draw them on white paper, trace, then color.  I do not have students cut out on this day because clean-up is a mess with many little loose un-glued animals all over the ground.  

I've learned that leaving the cutting and pasting is best for day three, which also gives room for finishing touches (like the students who wanted to add a sun or finish a tree).  Have students trace a thin circle around the animals before cutting out.  This saves the trouble of having heads and tails accidentally cut off since students will have a line to follow instead.  Students can then glue down their animals wherever they wish in the jungle, as long as it's within where the animal should be (no turtles in the sky!).  When students have finished their jungle landscapes, glue a 12" x 18" paper to the back for a frame