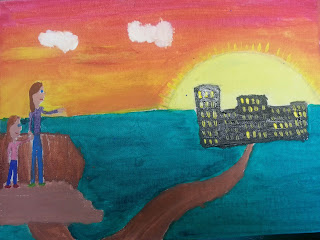
Acrylic painting is fun, but tricky to use at the elementary level. As stated in my previous post, I offered an after school art class each fall on acrylic painting techniques for 5th and 6th grade students, with an annual mini art show after the class finished their canvas paintings. With so many students enjoying the acrylic painting class each year, I decided to have my entire 5th grade create their own acrylic painting.
Unfortunately, I have not taught this project for an entire 5th grade on a cart. The paint takes longer to wash out of the brushes, so I need a sink with a strong current close by. The paint is also tricky to wash off tables, and with working on desks in classrooms, it was challenging to manage 20+ students during acrylic painting clean up. So...in the past, I've only taught this project from a cart after school with fewer students.
Since I now have two classrooms I share (with a sink in both), I took on the challenge of handling the set-up and clean-up of acrylic painting with an entire class.
Let's start with the basics first. Here are the materials I used for my project, but you can adapt your own painting surfaces to what you prefer:
Materials
-8" x 10" canvas boards (I ordered mine from nasco in bulk, around 80-100 at a time.
-Different size nasco brand brushes (with having students who do not fully wash brushes all the way and my lack of time to check, I don't use expensive acrylic paint brushes.
-Acrylic paint (I use the crayola basic color set, but prang also has some nice colors and is easier to pour. For advanced painting techniques, I love liquitex tubes)
-Water bowls
-Newspaper (can be used for mixing palette too)
-Pencils
-Black markers (if needed)
-Paper Towels
-Paper plates (easy to toss palettes)
Objectives
One of my main purposes for using acrylic painting for the entire 5th grade was to introduce a new material they would learn to be responsible with. To view my tips to manage set-up, clean-up, and materials, click here to view the post.
For acrylic painting techniques I share with each class, please click here to view that particular post. With the limited time I have with the classes, the main techniques I teach are with layers.
The main element of art I use with this lesson is space: using three ground to create a landscape (foreground, middle ground, background). Since I focus on showing students how to paint the background first and add each layer on top, I felt it was the best way to understand how to create perspective with painting.
Day 1 is focused on introducing the perspective and how to choose landscapes that would appeal to the students (cityscapes, football fields, etc...). I show Van Gogh's "Starry Night" as the main example.
On day 2, I show how to start with the background and blend multiple colors to create the sky. Students always want to start with clouds and stars, but I tell them to wait. One layer at a time!
Day 4 is for the foreground. The cypress tree in Van Gogh's painting is the closest to the viewer, therefor the largest object in the painting. I ask students to draw one object in the foreground that ties the picture together.
On day 5, If students complete their painting, I show how to add expressive details to make their paintings pop a little more.
Here are some finished examples!


Beautiful work...
ReplyDelete:)Elizabeth
paintersofdream.blogspot.com
Really enjoyed reading this post! A well-chosen canvas painting can instantly add depth, colour, and personality to a room. I love how artwork brings emotion and style together so effortlessly. I recently explored Vibecrafts’ collection, and their canvas paintings are beautifully crafted, making them a perfect choice for adding an artistic touch to modern home décor.
ReplyDelete