

Here's the entrance to my room. I share it with the music teachers, hence the shelf filled with instruments. When I first walked in, I said,"The kids are going to head straight for the instruments!" There will be a covering during the day to prevent the distraction. I have four tables to the left, and three tables to the right that are behind the shelf. All students can easily see me in front and down the middle of the room. The center table is for demonstrations and materials to be distributed. The middle cart is my "creation station" for common supplies, like pencils, glue, and scissors.

Here's the station label!

Here's the cart with the materials...

Look familiar? Covering the coloring sheets!
Labeling the Tables
And next comes the table numbers! Since there were 7 tables, I labeled them with the elements of art! Can you name each one?


Visuals and Displays, aka "Eye Candy for the Art Room"
I just can't have a blank wall, it drives me crazy! With all the space available, I cover it with more visual learning. The wall below is Art History with examples of each art period:

Here's another view of the same wall.
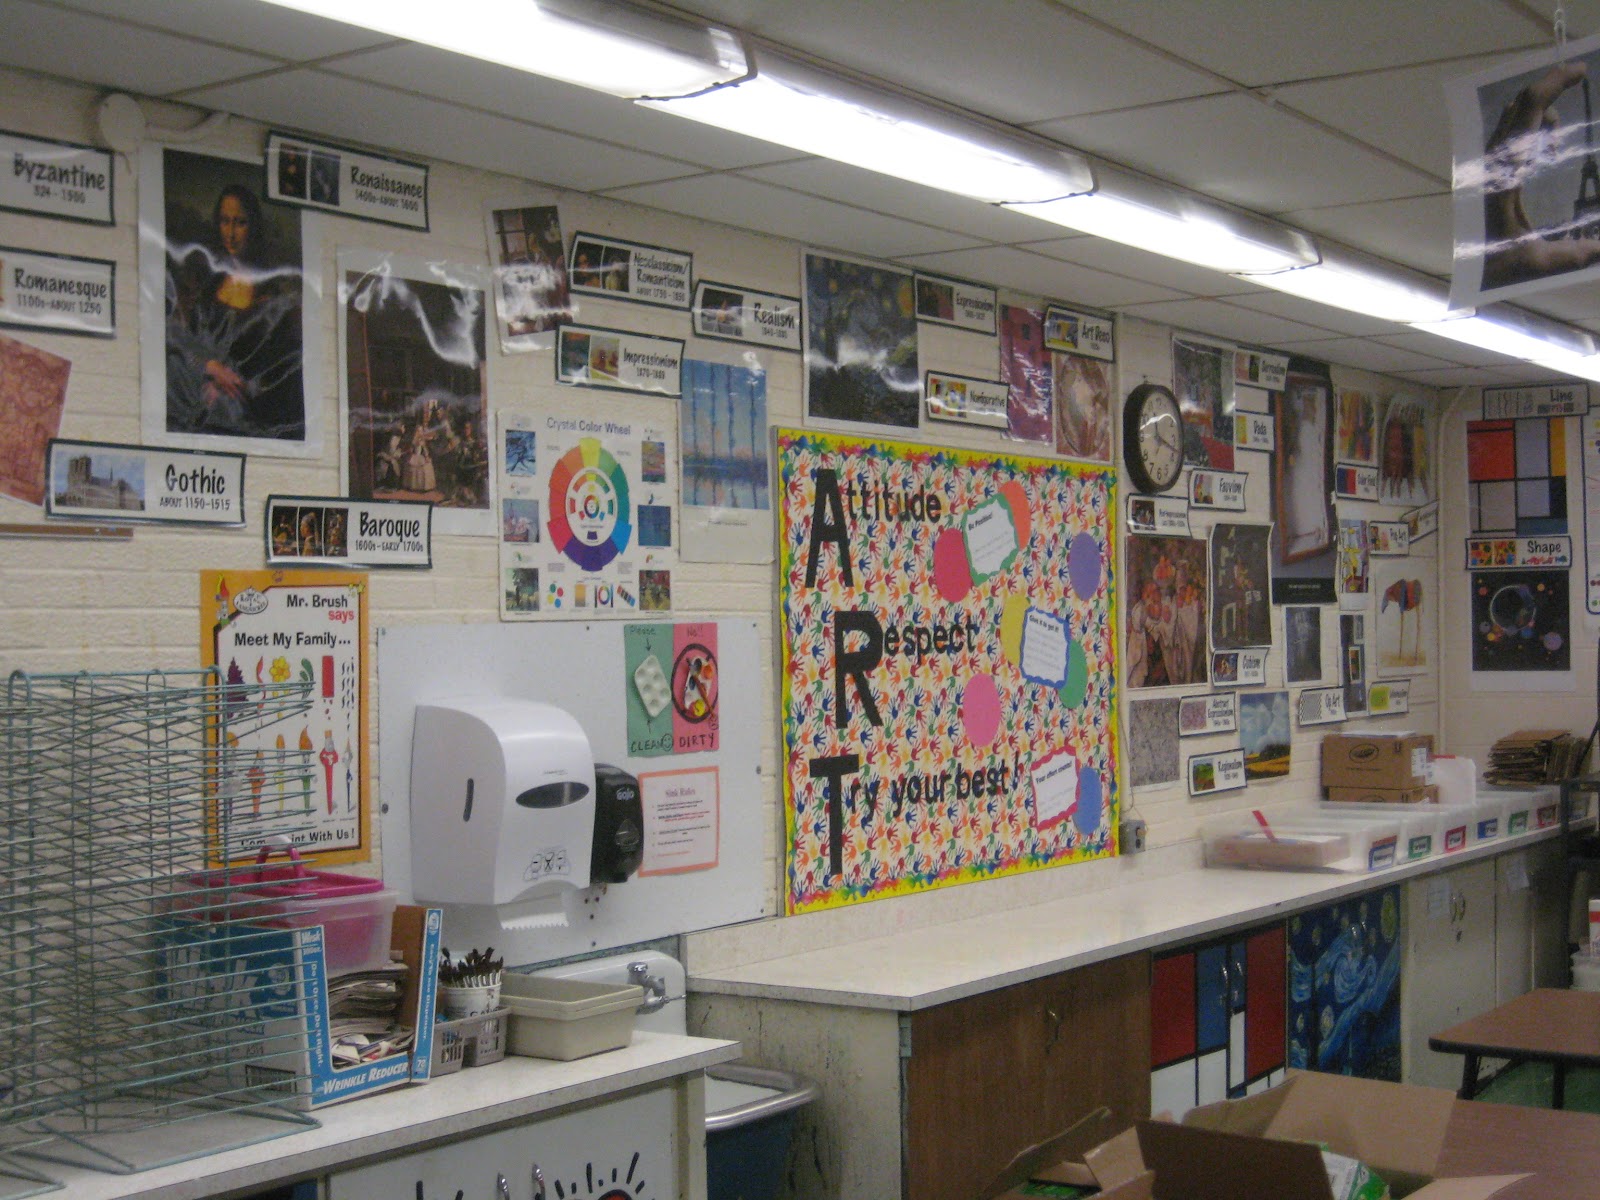
My elements of art and principals of design wall

I still haven't figured out this wall. I hang my favorites, the I need the rest of the space for storage. Art projects are filed by colors for each day, paper rack is organized!

My desk area with the national board certification plaque to remind me of the hard work it took to get where I am. I have a technology cart and a cart for taking clay to the kiln room in the Jr. High section of our school.

I love this idea! I needed some visual examples of what habits I'm trying to get my students to change (like rushing their coloring!)

Resources
My resource library is a growing collection, and I'm about maxed out! The top shelves are books to read, such as children's books about artists, stories about art (like Olivia Paints a Mural), and Visual Literacy. The second shelf is filled with drawing books, separated by categories and always mixed up at the end of the day. The bottom shelf is for the younger students: shapes and pattern games and dry-erase boards with markers.

Personal Touches
I can't forget to show the doors! To see each one, please visit my previously written blog posts.

Welcome Messages
Yeah, I got this from Pinterest. :)

And this was just the first school! I still have another school classroom to finish up, but I can give you a sneak peak of what I'm working on!

Your room looks great! :) Love the tree in the last photo!
ReplyDeleteThank you!!!
ReplyDeleteHi Heidi, I think I may have found a kindred spirit! My classroom is my car!!! I love what you are achieving with your shared rooms - please visit me at Dream Painters :)
ReplyDeleteWill do, Elizabeth! Have you heard of the other Heidi who's researching the effects of teaching from a cart/traveling?
ReplyDelete